Reliance has started rolling out their much awaited JioGigaFiber connection in selected cities. Currently beta testing is going on with a preview offer in which a security deposit of Rs. 2,500 is charged for a 2.4GHz ONT device (GigaHub Home Gateway), you will get 100GB/month data and unlimited calls when connected a landline phone to the router.
Want to know how to access hard disk content via GigaFiber Media Server? Click here.

During the installation, the installation guys asks you to change the SSID and password but after sometime the router downloads and installs the latest firmware and resets itself. You will have to connect to the router with the default SSID + password written on the back of the router to connect and then change the settings.
How to change SSID and default password?
You can change the SSID and password via the router admin page or via My JIO app.
Changing SSID and password via router admin page
Type http://192.168.29.1/ in the browser, login with the default router username as admin and password as Jiocentrum. On successful login, you will be taken to the router dashboard.

Login Screen
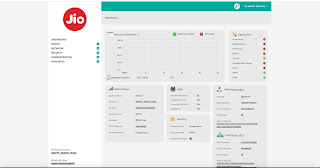
Dashboard
Click on the Network link on the left menu, then Wireless. Now go to the Profiles tab.
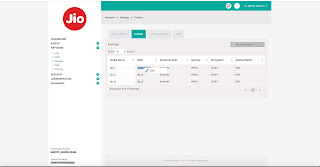
Network Profiles Tab
Right-click the profile(SSID) you want to change, and click Edit. Ignore the warning and proceed to the Wireless Profiles Configuration. Here you can set the desired SSID and password.
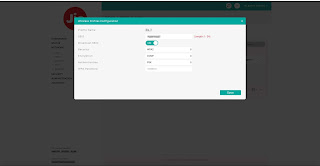
Wireless Profiles Configuration Page
Once done, click on Save and you are done. The new SSID you configured just now will appear in the available wireless networks list on your device, choose this profile and provide the new password.
Changing SSID and password via My JIO App
For this method, you should first download and install My JIO app from the Google PlayStore (link). Once installed, login to the app with your registered mobile number, use OTP method to authenticate yourself.
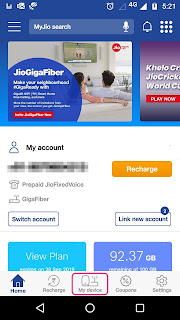
Home Screen of MyJIO App
Now click on the My Device link at the bottom of the screen. You can see the details of your router along with the serial number.
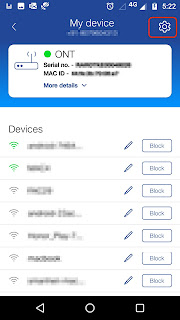
Router Settings Screen
Click on the settings icon on the right.
On this screen you can change various settings such as turning on/off SSID, change visibility, enable/disable WPS, change number of devices that can be connected to your router etc.
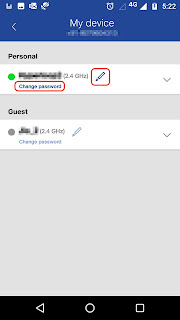
Device Details
Now, to change the SSID, click on the pen icon next to the SSID, provide new name and click on Submit.
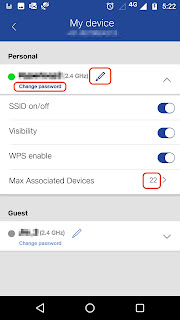
Device Settings
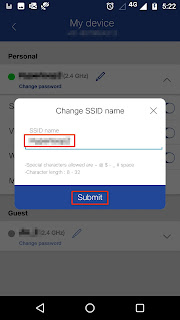
Change Settings
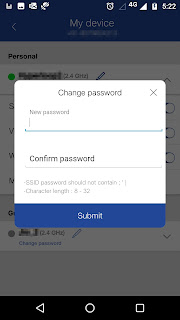
Change SSID
To change wifi password, click the Change Password link, enter new password and click on Submit.
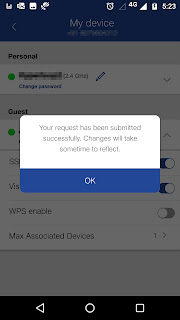
Change Password
Now you can connect to your router with new SSID and password.
Disclaimer: The details given above are for the router model JCO110 but the steps are more or less similar with other models such as JCO300, JCO500 etc. Let us know if you are facing any difficulties in changing the settings via the comment box below.

Thank you so much for this post
ReplyDelete